If you work in civil engineering, construction, archaeology or any field where understanding physical layouts is critical, you can likely use data and mapping to greatly benefit your work. Two techniques in particular, photogrammetry and remote sensing, provide a wealth of valuable data to increase precision and accuracy in planning, analysis, construction and excavation.
Remote Sensing Explained: A Comprehensive Overview
Remote sensing involves identifying and measuring objects or events — for instance, weather events — without contacting them directly.
Remote sensing relies on detecting different wavelengths of light radiation. Objects may emit or reflect this radiation, and remote sensing can identify and process even small differences across an extensive array of wavelengths and spatial orientations. Professionals use these differences to identify objects and categorize them according to their type, material or location. They can also use them to measure slopes and distances.
What is remote sensing used for? Satellites have used remote sensing in meteorological operations for decades. Remote sensing first came into use because of the high number of color bands in satellite imagery. The technique used those color bands to collect 2D information for weather tracking and geographic information system (GIS) mapping, for instance. Today, many satellites in orbit still use remote sensing to gather a range of information from the Earth to evaluate weather and land cover and generate maps.
Remote sensing doesn’t have to work at such great distances, however. This method is also useful for gathering data for terrestrial projects, like surveying land with drones or earthworks construction. Remote sensing encompasses any observation and measurement methods that do not rely on direct contact with the object or landform in question.
The Fundamentals of Photogrammetry in Mapping and Surveying
Photogrammetry uses imaging rather than collecting light wavelength data. It involves determining the spatial properties and dimensions of objects captured in photographic pictures.
Albrecht Meydenbauer, a Prussian architect who made some of the first elevation drawings and topographic maps, first used the term in 1867. Today, an airplane, satellite, drone or even a close-range camera might record digital images for photogrammetric use.
Photogrammetry relies on a technique known as aerial triangulation to measure changes in position. This method involves taking aerial photographs from more than one location and using measurements from both places to pinpoint locations and distances more accurately. The various photographs provide different lines of sight or rays from the camera to specific points. The trigonometric intersection of these lines of sight can then produce accurate 3D coordinates for those points.
Modern photogrammetry also sometimes relies on laser scanning as a complement to traditional images. Light detection and ranging (LIDAR), for instance, which uses pulsed lasers to measure distances, often assists in photogrammetry performed from aircraft and satellites, as well as on the ground.
Photogrammetry breaks down into two main branches: metric and interpretive. Here’s more information on them:
Metric photogrammetry: This branch of the field involves taking exact measurements and frequently finds use in technical industries like engineering and surveying. Metric photogrammetry uses a metric camera to make precise computations and evaluate exact sizes, shapes and positions of objects or topographical features. It is also useful for determining coordinates and relative positions.
Interpretive photogrammetry: This branch of the field involves identifying general image features like sizes, shapes and patterns. It is useful for adding ancillary information to photographs rather than making direct calculations.
What is photogrammetry used for? Photogrammetry is exceptionally common in applications such as measuring landforms and terrain and developing topographic maps. Many industries, including fields as diverse as architecture, construction, engineering, forensics, forestry, geoscience, law and medicine, rely on the precise and accurate 3D data photogrammetry provides.
Achieve Precise 3D Imaging with Our Photogrammetry Services
Leverage the precision of our photogrammetry services for your construction projects. With us, you get the advantage of professionals who scrutinize every detail to minimize errors and boost success rates. Our trained technicians, engineers, and surveyors provide results refined by over 20 years of operation.
Analyzing Photogrammetry within the Scope of Remote Sensing
What are the main differences to consider regarding photogrammetry vs. remote sensing? Explore them below:
Data type: One of the main differences between photogrammetry and remote sensing lies in the kind of information collected. Remote sensing collects data in the form of light and color. By detecting different wavelengths of light radiation, it can generate maps. Instead of measuring wavelengths of radiation, on the other hand, photogrammetry uses imagery to measure coordinates in space.
The number of dimensions: These differences also mean remote sensing tends to work in two dimensions while photogrammetry tends to work in three dimensions. Remote sensing can create informative 2D maps, while photogrammetry is ideal for more complex 3D modeling.
The Diverse Applications of Photogrammetry and Remote Sensing
Below are a few applications that frequently use remote sensing and photogrammetry:
Enhancing Emergency Response with Advanced Mapping
In an emergency, professionals need reliable data to develop plans for stanching floodwaters or containing fires. Remote sensing can provide an accurate picture of topography and map the scale of the disaster. Photogrammetry enables teams to generate reliable 3D models for planning evacuation routes or containment approaches.
Assessing Environmental Changes Through Targeted Surveys
Environmental science often uses remote sensing to gain concrete data about how ecological changes have progressed. For instance, a team might use remote sensing to map the decrease in foliage in a particular area or track the recession of glaciers or the polar ice caps.
Shaping Earthworks Projects with Precision Imaging
Building earthworks requires detailed information about the landscape and topography. Engineers use remote sensing and photogrammetry to collect necessary data for grading the land and constructing features like roads, bridges, dams, canals, utility layouts and distribution and drainage systems. A drone can fly over a job site, for example, to capture data and turn it into a point cloud for use in planning projects.
Innovating Mining Operations with Aerial Data Acquisition
Mining companies need reliable methods for monitoring their existing mines and scouting for new sites. Remote sensing and photogrammetry enable companies to generate maps and 3D images for these purposes.
Archaeology’s Digital Revolution
Archaeological teams often need detailed 3D models so they can examine sites without disturbing delicate artifacts. Taking thousands of still photos and compiling them through photogrammetry enables these teams to develop highly accurate and realistic 3D models. Photogrammetry is also often indispensable for the virtual reconstruction of cultural heritage sites.
Advancing Forensic Investigations with Detailed Scene Reconstruction
At a crime scene, it’s essential to disturb the evidence as little as possible. But law enforcement personnel still need ways to examine the scene. Photogrammetry offers an ideal solution — a drone can fly overhead to take photographs and develop reliable 3D models for use in the investigation, as well as for lawyers and insurance adjusters. In countries like Colombia and Guatemala, photogrammetry has also helped detect and document clandestine graves where commercial satellite imagery was insufficient.
Documenting Architectural Heritage with High-Resolution Imagery
When architects or restoration specialists must survey historical buildings, remote measurement helps them ensure the structures’ continued integrity. Photogrammetry allows these teams to develop 3D maps, typically generating elevation drawings at scales of 1:20, 1:50 and 1:100, without touching or damaging the architectural features.
Connect with Take-Off Professionals for Specialized Photogrammetry Services
To see the benefits of reliable 3D imaging in your next construction project, partner with TOPS.
Why should you work with experts for photogrammetry services? When you do, you’ll gain the peace of mind that comes from working with professionals who have years of experience in the industry. Photogrammetry is a complex process, so collaborating with seasoned pros minimizes errors and increases the chances of a successful project.
Working with the experts at Take-off Professionals also means partnering with teams that specialize only in data. We don’t provide software or hardware — instead, we focus all our attention on data and modeling. You’ll get the careful attention your project deserves while knowing we have the in-depth focus to tackle even the toughest challenges. We also have dedicated engineering and surveying teams who can provide tailored guidance for civil engineering.
Contact us today to learn more about how photogrammetry can enhance your work.
Many of our customers find that capturing images during the life of a project is useful. In this article, I will discuss the options available for processing images.
There are two options for image processing and surface generation – do it yourself or pay someone else. I will go over the good and bad associated with both options as well as a brief review of some platforms available.
In-house Processing
When I started out in this industry, we did all of our own image processing. There were no options. My advantage was having a wife who is a professional photographer. She gave me guidelines for manual camera settings to improve image quality. Our results were nothing short of amazing. Once I knew how to set the camera, we experimented with different flight patterns and coverage to dial that in.
The survey aspects of getting good control, setting and shooting ground control, and adding check shots is procedural.
Tips While Shooting in the Field
Control needs to be established, regardless of who processes the data.
Make sure the scale factor is between 1.0000 and .9999 for accurate data.
There is no established rule for the number of GCP’s (Ground Control Points) set. In flat areas, I may set one (1) per acre and hilly sites two (2) or three (3).
While walking from one control point to another, take topo shots for use later.
When your partner is flying a drone, walk around and shoot more topo points.
Make sure to occupy the GCP’s for enough time. Accuracy is key.
Topo shots can be quick.
Use the best camera available for your platform. Make sure the lens is clean.
Be sure to check the images in the field before you leave.
Time of day and cloud cover have a big impact on image quality. Sometimes you will need to wait for better conditions.
Overlap and flight lines are a bit of an art. Start with recommended numbers from the software provider. For example, Pix4D has different overlap specs for general dirt operations, dense vegetation, and corridors. Do not just run out and do 90% frontal and 90% side overlap “just to be sure.” You will waste time and processing will not be better than lower numbers.
Back at the office, work is a balance of hurrying up and then waiting.
Steps to Take in Office
Transfer images from the camera memory cards to your computer.
Batch process images if necessary (more on this later).
Import images into your software, as well as GCPs.
Mark ground control on imported images.
Processing frequency varies by vendor. Assume 2 or 3 long processing waits while you do something else on another computer.
Invest in a high-quality standalone computer for constructing photogrammetry models. You will not be sorry. Your vendor will have recommended components. Do not skimp on any of them.
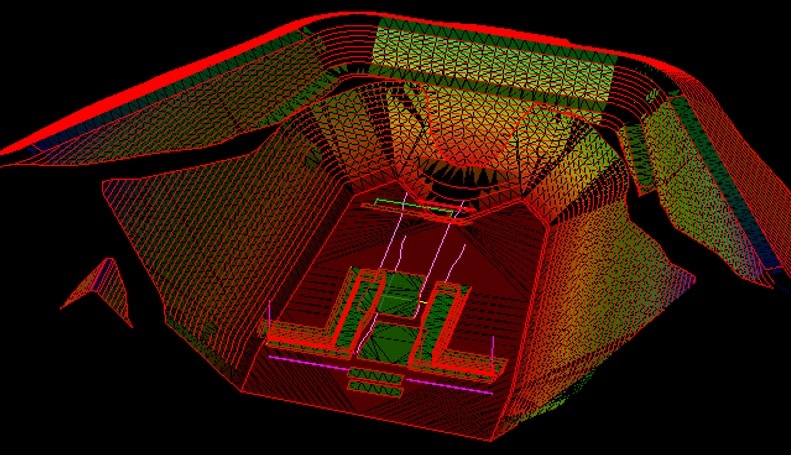
Go through the required steps to get a surface.
Review and verify the surface. The person(s) who flew the site should be there for review of the model. They can help with the initial review and help define out-of-tolerance areas.
Bring in your top points and compare them to the surface. Confirm tolerance.
Filter the surface density to get what you need for comparison.
Surface Size
When the data processing is complete, I will want to keep the surface large. The reason is I like the way takeoff data software allows me to make a hybrid surface to get detail with a smaller file size. In most cases, a 10 or 20-foot grid will work. Carlson has a feature that allows a point to be added at a horizontal distance and/or a vertical change in order to get tops and toes of slopes as well as small channels or berms that get missed in a grid. Either way, there is no need to use a huge file size where a smaller one does the same thing. I have done testing. Try for yourself and you will find the balance as well.
When exporting a surface to be sent to others, here are a couple of tips.
Send them the same surface density you are using.
An XML TIN is fine. Older software can use that TIN file saved as DXF triangles.
Batch Processing
This may seem like over-information, but I need to mention these details as it has saved us on many occasions. Adobe’s Lightroom can batch-process images to make edits to all of them at the same time. In other words, if something is wrong with the images you captured, you may be able to be correct them using the program.
Underexposure due to cloudy conditions is the toughest. It is hard to adjust lighting from dark to light, however, I have been able to improve flights by processing.
When in doubt, overexpose your images. It is easier to bring down contrast.
Sharpening can help, but usually causes problems. Best to get good sharpness from initial camera settings then try to adjust afterward.
The biggest issue is the fact that this represents another software to learn and a steep learning curve. As a professional who does a lot of this, it is just another software expense that saves us or a client another long trip to a site that may have changed drastically since we were last out there. In cases where the site is remote and you got there on a bad day, this option can make things work. Something to keep in mind if you start doing a lot of photogrammetry.
Using a Service Provider
The easiest way to get a surface from a flight is to upload the images to an online photogrammetry processing provider. There are several things to be aware of when doing this.
Everything gets processed the same. Be certain you know the exact overlap and image quality the provider expects.
They were not on the flight. Special instructions or interaction are not available. This prevents them from getting firsthand knowledge of the site to improve quality.
Results vary. Sometimes the same set of images sent to the provider at different times yield different results.
Turnaround time is going to vary.
Some services do not allow you to download a surface. You can only use their online tools.
These are not a lot of negatives to the process. I like using a third party especially for interim topos of dirt progress. Here are more advantages:
Click it and forget it. It is easy to get the images uploaded for results to come back.
Surfaces are stored online reducing the need for additional storage space in your system.
The online tools are great. Two useful tools include: sliders to see date changes to a surface and the ability to share with your client.
These services are mature, and results should be consistent. As a test, you can rename a group of images and compare surfaces.
You will fly your drone more if you know that someone else is doing the processing.
There are a lot of online services available. Both Trimble and Carlson have their own, with a lot of independents vying for your business. Here are some tips for selecting one:
Do not be tied to the service offered by your software. Look at it but consider others. The interface is usually a macro that automates some easy steps.
Prices vary widely. You will find everything from pay per megabyte to unlimited. Be sure you know what you are getting before committing.
Image size and overlap may be an issue so check their requirements. If they want a large overlap and you are paying for file size this can skew pricing significantly.
It is difficult for a provider to promise turnaround times. A trial can help you to see how efficient they are.
Online tools are important. Look for the ones that suit you best. Some sites are geared to mines, others to corridors. The surface and calculation features differ. Pick one that works for you.
I have found the best results are when I can process in-house and then send data to a good provider. I can take care of the parts that need special attention and basic dirt numbers can go outside.
You need to be careful here. Never mix the service and your work without a baseline. Here is how to do this:
Gather the images. If your settings are different from the provider, you will need to make two flights.
Process your surface and send the images out for a surface.
Anytime you fly and process, only compare to your other work.
Never do a quantity verification mixing the two.
If you must mix, do a report of the recent outsourced surface to your new flight. Send the images out as well. Do a volume calculation and note the differences to adjust any subsequent work to be done on them.
For centuries, photogrammetry has played a critical role in our understanding of faraway objects and the Earth’s surface. Its uses have expanded over the years and have led to a powerful range of game-changing technologies in industries like construction, engineering, medicine and much more.
Photogrammetry is defined as the science of using photography and digital imagery in surveying and mapping to measure distances between objects.
Photogrammetry surveys gather measurements and data about an object by analyzing the change in position from two different images, using things like perspective, advanced processing software and photo analysis to get the job done. It can happen on the ground or from the air.
In this guide, we’ll explain the different types of photogrammetry and how it can be used.
Decoding Photogrammetry: A Comprehensive Introduction
The process of photogrammetry can vary, but the general idea revolves around gathering information about an object from photos of it. The photos are taken from different locations and angles to allow for precise calculations that help analysts gather the data they’re looking for. Typically, they use things like photo interpretation and geometric relationships to gather measurements. With the data gathered from photogrammetry, we can create maps and 3D models of real-world scenes.
The technology has been around for a long time and has been an important part of a variety of research in the last century. Its principles date back to Leonardo da Vinci’s research on perspective in 1480 — and many theories say it goes back even further. After the invention of flight and World War II, photogrammetric technology really increased, with powerful camera designs and new aircrafts built specifically for aerial photography and better camera positioning. All of the new inventions even put photogrammetry on the moon to map its surface during the Apollo missions.
If we break down the word, we can clearly see all of the parts that make up photogrammetry in play. “Photo” refers to light, “gram” means drawing and “-metry” refers to measurements. Photogrammetry uses photos to gather measurements with which we can create drawings and models.
Enhance Your Construction Efforts with Accurate 3D Imaging
Accelerate your construction projects with our accurate 3D imaging and photogrammetric data. At TOPS, we prioritize efficiency, even when time constraints are tight, supporting you with quick yet precise drone data point surface modeling, and custom photogrammetry services.
Exploring Aerial Photogrammetry for Large-Scale Mapping
Taking aerial photos is one of the most common approaches to mapping out an area. In this process, a camera is mounted on an aircraft and pointed toward the ground with a vertical or near-vertical axis. As the plane follows its flight path, the camera takes multiple overlapping photos, which are then processed in something called a stereo plotter.
The stereo plotter is an instrument that helps determine elevations by comparing two different photos and conducting the necessary calculations. With the help of photogrammetry software, we can process this information and create digital models out of it.
Delving into Terrestrial Photogrammetry Applications
These images are taken from a fixed position on the ground with a camera’s axis parallel to the Earth. Data about the camera’s position, such as its coordinates, are collected at the time the photo is taken. The instruments used for terrestrial photography are often theodolites, though regular cameras are sometimes used as well. Terrestrial photogrammetry for surveying typically requires fewer resources and skilled technicians to accomplish, but it may take longer to cover a large portion of land.
The Frontier of Space Photogrammetry: Beyond Earth’s Atmosphere
Moving out to a larger scale, space-based photogrammetry occurs with cameras either fixed on Earth, in an artificial satellite or positioned on the moon or another planet. In fact, photogrammetry was touted as a key part of space exploration even in the ’60s, and technological advancements have made it even more relevant. It can tell us about cloud patterns, create accurate maps of Earth and gather data about faraway planets.
Dissecting the Types and Roles of Imagery in Photogrammetry
Since aerial photogrammetry is one of the most common methods, let’s take a look at how those photos get classified.
Typically, aerial photos will fall under one of two categories:
Vertical photographs: These images occur when the camera axis is vertical. So, if you put the camera in an airplane, its lens would point down to the ground for a birds-eye view.
Tilted photographs: Though the axis may be nearly vertical, tilts in the aircraft can cause an image to be unintentionally tilted in one direction. Within the category of tilted photographs, we have oblique photos, in which you can see the horizon line, and low-oblique photos, in which there is no apparent horizon. The classification depends on the level of tilt of the camera off of its vertical axis.
The lens of the camera can also offer a range of coverage. For instance, an ultra-wide-angle lens captures a larger field of view than a normal-angle lens. It would gather more of an image in its sights but could create distortion at its edges, depending on the lens and camera design.
When collecting aerial photos, operators capture many images in succession. These images need to overlap with each other, so the image processing software can identify the changes and understand where specific objects are placed. When it can capture those common items, it can more effectively stitch the photos together or gather data about their positions.
Core Principles of Photogrammetry: A Guide to Precision Mapping
This process can get complex, but it all comes down to the concept of triangulation. Triangulation involves taking pictures from a minimum of two different locations. These pictures create lines of sight that lead from each camera to specific points on the object being photographed. The intersection of these lines plays into mathematical calculations that help produce 3D coordinates of the specified points.
Triangulation is used in a wide variety of fields, from agriculture to military intelligence, but it is commonly associated with land surveying. Surveyors use theodolites and triangulation to gather the location of a point with the help of angle measurements. Triangulation networks can also help with a surveying system by maximizing accuracy.
It’s actually similar to the way our eyes work and create depth. Depth perception occurs when we see an object from slightly different angles, those angles coming from each of our eyes. Our brains process the two images and make them into a single image that we can comprehend in a process called stereopsis. This whole process is similar to triangulation.
Essential Characteristics of Photogrammetric Imagery
Some aspects are necessary for any photogrammetric model. These features include:
Tie points: Tie points are coordinates that can be linked across multiple overlapping images. Typically, these are features present in both or all of your photos. The tie points help the photo adjust with shared coordinates.
Ground control points (GCP): GCPs help to orient the image in relation to the Earth’s surface. They use known coordinates to position the image within the real world.
Bundle adjustment: The adjustment helps to remove any distortion within a set of images. It reduces errors from real and predicted image points.
Diverse Modalities of Photogrammetry Surveys
While we can classify photogrammetry based on the location of the camera, we can also break things down by the type of photogrammetry being conducted. These types vary based on the kind of data being gathered.
Two forms of photogrammetry that you’re likely to encounter are:
Interpretive: Interpretive photogrammetry is all about identifying objects and gathering significant factors from an image with careful and systematic analysis. Photo interpreters gather information about their subjects, such as characteristics and features, by analyzing and evaluating the photos carefully. The job may involve remote sensing technologies. Remote sensing combines photo interpretation with data from remote sensing instruments, like cameras on satellites or aircraft and sonar systems on ships.
Metric: In metric photogrammetry, the goal is to find measurements. A researcher may pull specific data and measurements from a photo with the help of other information about the scene.
Metric photogrammetry also covers planimetric and topographical mapping:
Planimetric mapping focuses on planes and includes elements outside of elevation, like roads, rivers and lakes. It ignores these topographic features, only focusing on geographic objects.
Topographical mapping does the opposite, revealing the shape of the land and its elevations and contours. It shows the Earth’s surface in comparison to a specific reference point, like sea level, and can be used for underwater surfaces, too.
The Multifaceted Uses of Photogrammetry Across Industries
The ways that photogrammetry comes to life can vary widely by collection method, data gathered, industry use and compatible technologies.
Some of the products that come from the process of Photogrammetry include orthomosaics, digital surface models and digital terrain models. An orthomosaic is essentially a birds-eye view of a terrain that adjusts for distortion and can span wide landscapes. Digital surface models and digital terrain models represent surface levels and elevation. Surface models include buildings and trees, while the terrain model gets rid of all of these features, showing the height of the bare earth.
The most common use for photogrammetry is creating maps out of aerial photos. It is cost-effective and accurate, allowing planning entities like architects, local governments and construction workers to make clear, informed decisions about their projects without spending months scouring the landscape. It is also very detailed and can provide an exceptional level of information about an area.
Photogrammetry makes its mark in an array of industries, from medical research to film and entertainment. Here are some of the places you can find it:
Advancing Land Surveying with Photogrammetric Precision
We’ve already discussed the applications of photogrammetry in civil surveying, the results of which are used by many entities, including construction crews, governments, building planners and architects. All of the data gathered from photogrammetry inform them about everything from necessary safety measures to potential project results.
Engineering Innovations Aided by Photogrammetric Techniques
In the world of engineering, drone photography helps to evaluate sites for construction, as well as create perspective images and 3D renderings. Engineers can produce images of project results or previews, as well as analyze their current progress.
Transforming Real Estate with Detailed Aerial Surveys
In the digital age, where 80% to 81% of millennials find their homes on mobile devices, creating attractive, accurate listings can significantly improve the buying experience and their understanding of the purchase. Viewers can see the home from all angles and get a clear idea of what they’re looking at.
Enhancing Military Intelligence through Strategic Mapping
Photogrammetry also plays a role in data gathering for military programs. Accurate geo-locational models with low processing times are necessary for understanding a landscape. Aerial imagery and photogrammetric technology can work together to create accurate 3D maps quickly without any human input.
Medical Applications: The Role of Photogrammetry in Healthcare
While you might not think to put the medical field in the same category as land surveying, the 3D models that come from photogrammetric technology come in handy for a variety of health-related uses. It can also work alongside remote sensing technology to help develop diagnoses without invasive procedures.
The Creative Intersection of Film, Entertainment, and Photogrammetry
Photogrammetry can play a big role in set design and world-building for a variety of films and video games. 3D modeling can bring unique objects to fruition in a virtual world, like cityscapes for action sequences and accurate historical elements, such as statues and buildings. One popular franchise that uses photogrammetry is the “Battlefield” games, which have an art style that works well with these 3D renderings and recreations.
In addition to world-building, photogrammetry can also assist with designing special effects and real sets.
Unlocking Forensic Insights with Photogrammetry
Photogrammetry also plays a part in crime investigation. It can help to document and measure precise data about a crime scene and determine what was physically possible. There are also many photogrammetric experts that can assist in the courtroom.
Streamlining Construction and Mining with 3D Terrain Modeling
Project engineers and contractors can use accurate 3D models to monitor and plan their worksites. The information from a photogrammetric model can help create a smart worksite with sensors and safety features that improve the environment. These models work in tandem with connected vehicles.
Sports with Spatial Analysis
Analyzing athlete movements can help coaches and researchers understand more about their activities. They can develop virtual training systems and learn about the physical effort that players expend by tracking their body movements. Topographical maps also come in handy for outdoor athletes, like hikers, mountain climbers, skiers and snowboarders. Mapping remote areas is often easier with the help of photogrammetric technology.
Cultivating Advances in Agriculture and Forestry with Aerial Imaging
In agriculture, aerial photos can offer insights into soil quality, irrigation scheduling, nutrition, and pests. Farmers can adjust their planting schedules or adjust irrigation and fertilizers with this information. They can also use photogrammetry when assessing growth and crop damage after storms or floods.
Researching and managing forests becomes significantly easier with the help of photogrammetry. It can produce models to analyze various aspects of a forest, like timber volume and height, to better understand the development of a forest.
Partnering with TOPS for Expert Photogrammetry Data Preparation Services
If you work in an industry that could benefit from photogrammetry or have another need for 3D modeling and photogrammetric data, Take-Off Professionals can help you get it. Here at TOPS, we create detailed and accurate surface models to help improve your work. Aerial photogrammetry is one of the fastest methods we use, which makes it especially helpful if you find yourself in a time crunch.
With the New Year well underway, I wanted to take a look and review the advances and advantages of current imaging technology as it relates to creating surfaces from LIDAR and Photogrammetry.
It appears that the more things change, the more they stay the same. Several parts of this world have made great strides while many remain slow to progress.
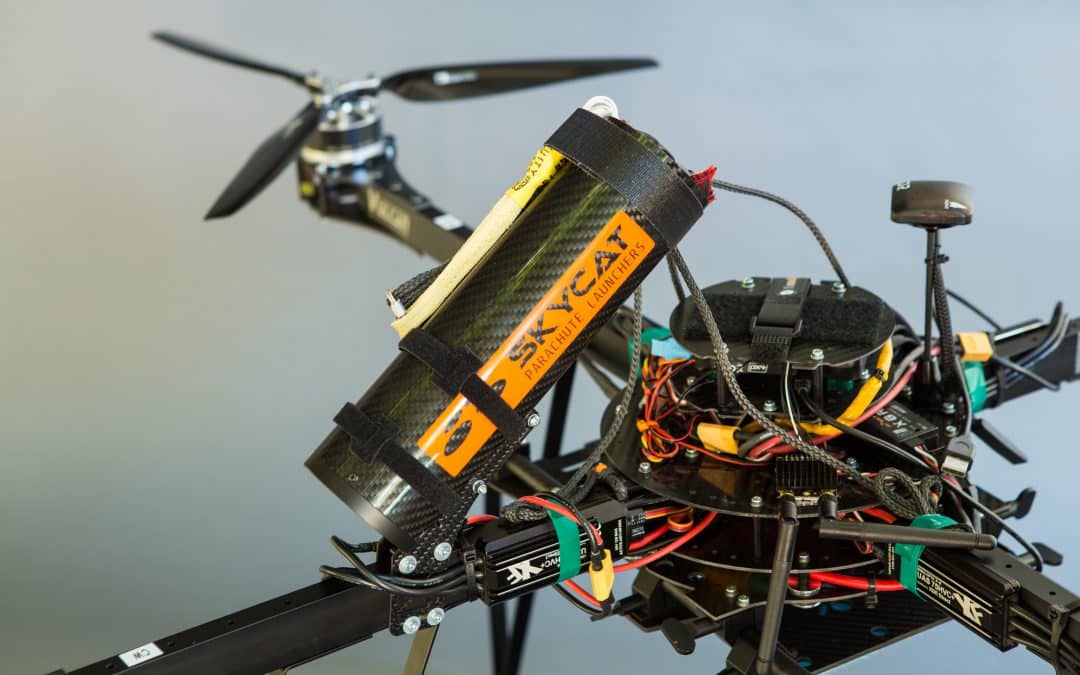
Drones
UAV platforms are cool, that is unless you have $38,000.00 in the air and it’s not responding to your request to come home. We need this device to do one thing; move a sensor in a predetermined pattern and image when requested and return safely for another use.
Prospective buyers have become focused on flight times, but the real number I always want to know is coverage and quality. A great camera with a proper lens can go high, fly for a short time, and get the accuracy we are after. Once you know all the variables, the questions you ask will change.
Multirotors have idled in regard to advancement. Good motors, precision GPS, and bigger more efficient batteries have allowed good flight times and safe operation. We use parachutes with our copters and feel comfortable sending them up.
Fixed-wing platforms are split into two distinct camps, hand and wheel launch. The small, quick wings cannot carry good cameras and data quality suffers. The larger platforms need wheels and smooth ground but offer the benefit of carrying a larger sensor for better images. There is crossover in these types including hand launch/belly or parachute landing; the blurred line is offering some possibilities.
I am hoping this next platform gets proven soon, I like where it is going. The VTOL (Vertical Take-off and Landing) plane holds promise. Lift like a copter then fly high and fast with a big camera for a long time. Like any other platform, power is always the issue, to remedy this, some makers are putting gas engines to be used as thrust motors and even generators. I think we will have something worthy by year-end.
Imaging
At this moment, the best solution for aerial topography is a full-frame sensor camera and a good lens. We can obtain good accuracy on a consistent basis. There are some improvements on the horizon that will help things.
When a drone flight is not possible due to regulatory restrictions, our trade partner Doug Andruik at Syn-Geo created a two-camera pod he puts on the strut of a Cessna and effectively does close-range photogrammetry with a full-scale aircraft. A great solution for large acreage or no drone zones.
We are all waiting until LIDAR becomes effective for use on a UAV. Several versions are out with fair accuracies and high price tags. Development is happening daily because of the great potential of the application. I’ll look at these and report as they become available.
Improving Accuracy
One of the best things to come along for improved close-range photogrammetry is precision GPS. The Applanix chips (Trimble) have made geo-referencing images more accurate and easier. When an image is correctly geo-tagged, post-processing is quicker and the resulting 3D information is more accurate. Combine this exacting geo-tagging and good images and accuracy get much better. This makes our fieldwork more efficient and the results in the office better. In my opinion, this is the go-to solution; for now.
Pix 4D is still the easiest post-processing software, my issue is the same data set run multiple times yields different results and residuals. As with any processing of imaging data, check to many ground control points to verify accuracy. UAS Master from Trimble is a robust application with the ability to fully incorporate precision GPS orientation from the Applanix chip. I use the software on a regular basis but am hesitant about training users. When you know how all the aspects of the program interface you can do some great things. When first learning post-processing, there are too many variables in the software to “just click a few icons” and get a result like in other applications. That Power can be a pain to use sometimes. Rumors are that there will be some easier workflows coming in future versions, I’ll keep you updated.
Contact TOPS for Accurate LIDAR and Photogrammetry Data
Right now the best way to get reliable, consistent data is to fly a full-frame mirrorless camera with a high-quality lens using a copter with an Applanix chip and post-process in the software of your choice.
Always collect a TON of control/checkpoints so you know how good the results actually are. We earn our money back in the office slowly going over data, cleaning up the point cloud modeling, and shipping the client a good surface.
Whether it’s for urban planning, environmental assessments, or infrastructure projects, TOPS photogrammetry services have proven to be an indispensable tool for professionals. Embracing such cutting-edge technologies ensures that we remain at the forefront of geospatial innovations, harnessing the best of what modern imaging can offer.