JUMP TO SECTION
Basic Subdivision Models
It all starts with a model that represents the streets, pads, and common areas to required finish condition. By this I mean that depending on the scope, it may be street paving and curbs or rough grade if all they are doing is dirt.
The difficult thing about subdivisions is that we are working on a lot of corridors and intersections, and they all need to work together to make water do what we need for homeowners to drive safely. Nobody wants to scrape their spoiler on a steep dip or go airborne on a bump. These details should be sorted by the time the plans get to us but there can be issues that need addressing. We can catch issues during data production and let our client and the engineers know before a bad idea gets paved. Here are basic subdivision deliverables.
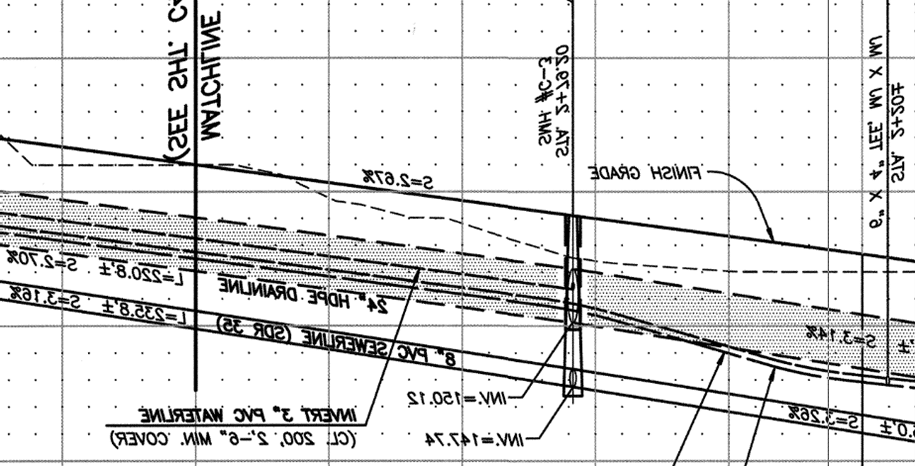
• Streets need to be done to plan/profile and template. We then drop them on plan view and clean the intersections.
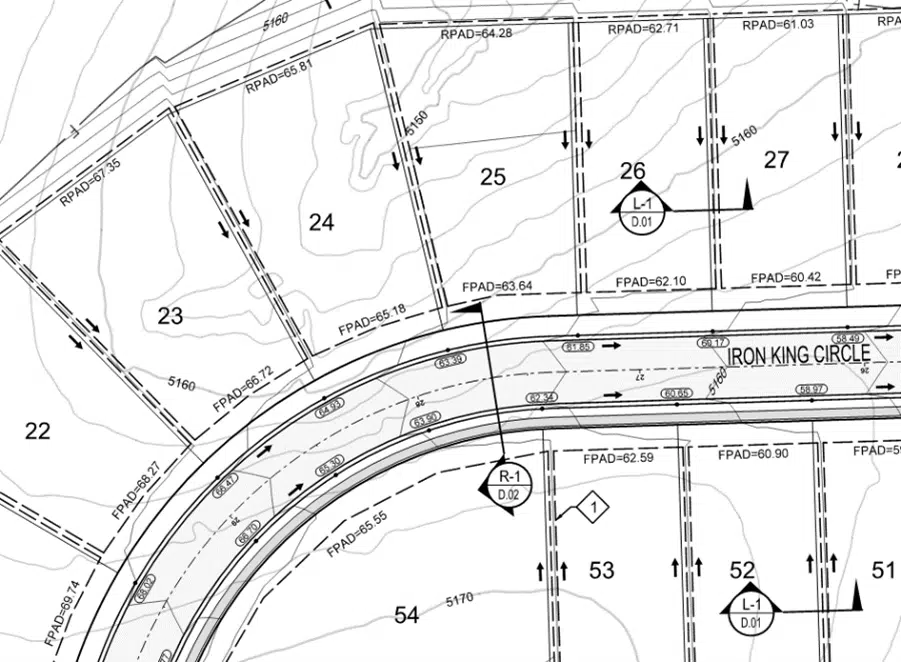
• Pads to their finish grade condition. This may be flat, sloped or stepped for walk out basements.
• Common and retention areas to finish. We may also include a subgrade for retentions if there is a liner or filler material to go in. This could also be sod.
• Some large lot sites do not get graded pads. We usually do a 3:1 cut/fill slope to native so the custom home can grade as they see fit.
• Utilities are optional and with housing, there are a lot of connections. This is a great data tool to use in the field.
For a long time, we were doing some cool stuff with housing. After the 2008 crash, the market came to a speeding crawl causing many of the forward-thinking people in the field to pursue different areas, and some never got back to doing houses. When things started to bounce back around 2012, housing was new to many people. Yes, we are still moving dirt but some of the tricks we used in the past to make things faster were new to the fresh crop of housing contractors.
The Gut Section
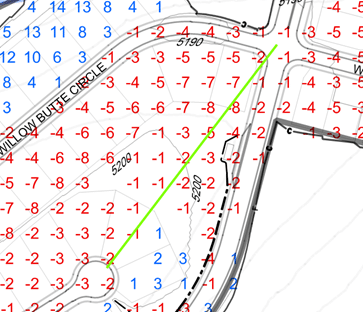
Many times, we are asked to build several different models for the streets. With top of native and possibly subgrade surfaces, we also build gut section models. This allows the contractor to rough grade for streets leaving room for the utility spoils to be used in place to get the job to top of native.

The red line represents the gut section. After the utilities are installed, the remaining dirt will be used to get the job to top of native. Note there is subgrade as well as paving shown here. Using this approach reduces the movement of dirt as well as speeding up the process.
Haul Roads
When doing large cuts and fills on a site using scrapers or haul trucks, good smooth roads are beneficial. Here is how we look at and build haul roads.
• As much as possible, use existing streets and connect them with custom haul roads that connect to the design profile grades so you are building road subgrade at the same time you are hauling.
• Produce machine control models for the haul road/finish street combination.
• Grade these on a regular basis to optimize the speed of equipment and keep stated cycle times.
• The roads often run through areas that are to be restored native or park areas. Verify you can do a topo of the area for returning to previous after your work is done.
• Sometimes we build a road on existing ground conditions to start. As dirt is added/removed, the crews dial down/up to grade the road. We have done three or four iterations of the profile for big cut/fill jobs.
The reason for these proposed basic rules is that many jobs were looked at like a site. Regions made from large cut areas and moved to large fills. When you utilize the finished street alignments you get a head start on them as well as leaving most of the pads alone to be completed early so crews can stay busy.
Early Utilities
Installing underground utilities requires a bit of planning but has become a real time saver in the field. We are now working on sites that are expensive to build on because of the large amounts of required dirt moving. None of us want to dig more than necessary so I got an idea. Why not install underground utilities before all the fill is done? Apologies for the poor example but I just could not find a recent set of plans with huge fill.
• Let us assume the minimum cover for the lines is three feet.
• In large fill areas, there may be 20 feet of dirt that needs to go in.
• We run calculations on areas where the storm and/or sanitary have more than three feet of cover.
• We build a “utility base fill” model.
• This model gives you three feet of fill in the utility areas.
• You can now do minimal fill, trench, and place pipe.
• When complete, the fill goes on as usual with compacted lifts as required in the engineering reports.
This works for different projects, not just housing. When you encounter large fill areas, keep this in mind. When using multiple surface models, be sure everyone is on the correct page. Things can get out of control quickly when there are mixed messages in the field. This is where the field person responsible for loading machines and data collectors are required to be on top of things.