When you are learning software, there are two approaches; menu driven and process driven. Software developers write commands so that understanding software revolves around the command(s) that fit the need. My approach is to find the shortest and straightest line to the finish. Processing data, for instance, can take 15 to 30 commands. I want the most direct path to the result. This often varies widely depending on factory or dealer training.
I will highlight some of the commands that I use for data prep that can make things go smoother. This is a good way to verify if you can streamline your process.
JUMP TO SECTION
CAD Elements
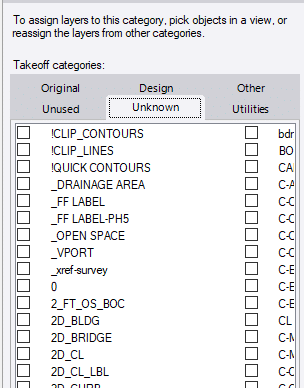
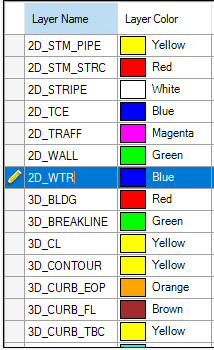
These layer names all now have been changed to CAD Standards. Having the same name used in every file is something everyone should do.
Where are we
At this point I have renamed the layers that have what I want for my model and linework. From there I have categorized them according to the places they need to be. Be assured when I get to this point, the list is dynamic. I will move things in and out of the groups to make things work better. This is where some of you may be thinking this process is not as good as including a few selected layers into a surface. I have done time and motion studies and it becomes a coin toss, but as I stated earlier, it sets you up well for a takeoff and changes to the site as the job progresses.
3D Elements
A surface is composed of three basic things: 2D lines, 3D lines and points. They are linked together to form a TIN, Triangulated Irregular Network. Choosing what goes into the mix is the rub. I want detail but not so much to clog the screen and drive me crazy when the time comes to fix things. In the old days, we used to worry about large surface files. They would slow down machines and make things jumpy. Now the control boxes create page files that are no longer an issue. Data collectors can still be a victim here, so it is wise to be aware of the surface file size.
Linestrings
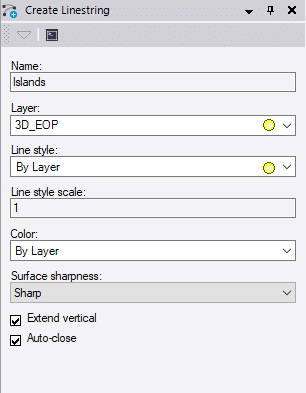
Use the details that can be added to a linestring to make it stand out. Go beyond the layer name. You can see here I have named the lines that will be my islands. They reside on the edge of pavement layer, but I can select them by name if I want to do something with them later. Line style is a bit of a problem. TBC is not good with handling a lot 
I will sometimes delete the layers that I do not need or change their line type to solid to make graphics happy. One of the major threads you see in this is the adaptation of the files and work you do to create the outcome you need. Therein lies the difference in training styles – I need to get this out the door, not explore the merits of the new useless command.
Linestring Tips
Here are some tips that make things easier with linestrings.
- Right click is your friend. Go into the coordinate box of edit a linestring and right click. A lot of options for COGO (Coordinate Geometry) come up.
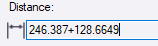
- You can do math inside an instruction. In this example I did a bearing/distance segment. The bearing is entered but I need to add two distances. I am lazy so I

- Arcs are easy to do with a lot of options including smooth curves and best fit arcs. There are also detailed COGO routines for curve functions that require exact information. The quick arc to clean up an area is a big help.

- Linestrings have two separate and editable attributes, horizontal and vertical. You can change the way a line looks on the screen and keep the vertical elevation points you held when entering them from the plans.
- Elevations do not need to be numbers. You can use deltas or percent slope.
- The toggle segments button in edit linestring will make everything smooth curves.
Point Density for Surfaces
When I build a surface, I like to enter the least amount of information possible. Here is a typical scenario:
- Enter elevations of contours to get things started.
- Elevate curb points to match the plans.
- Add points that look like they are necessary.
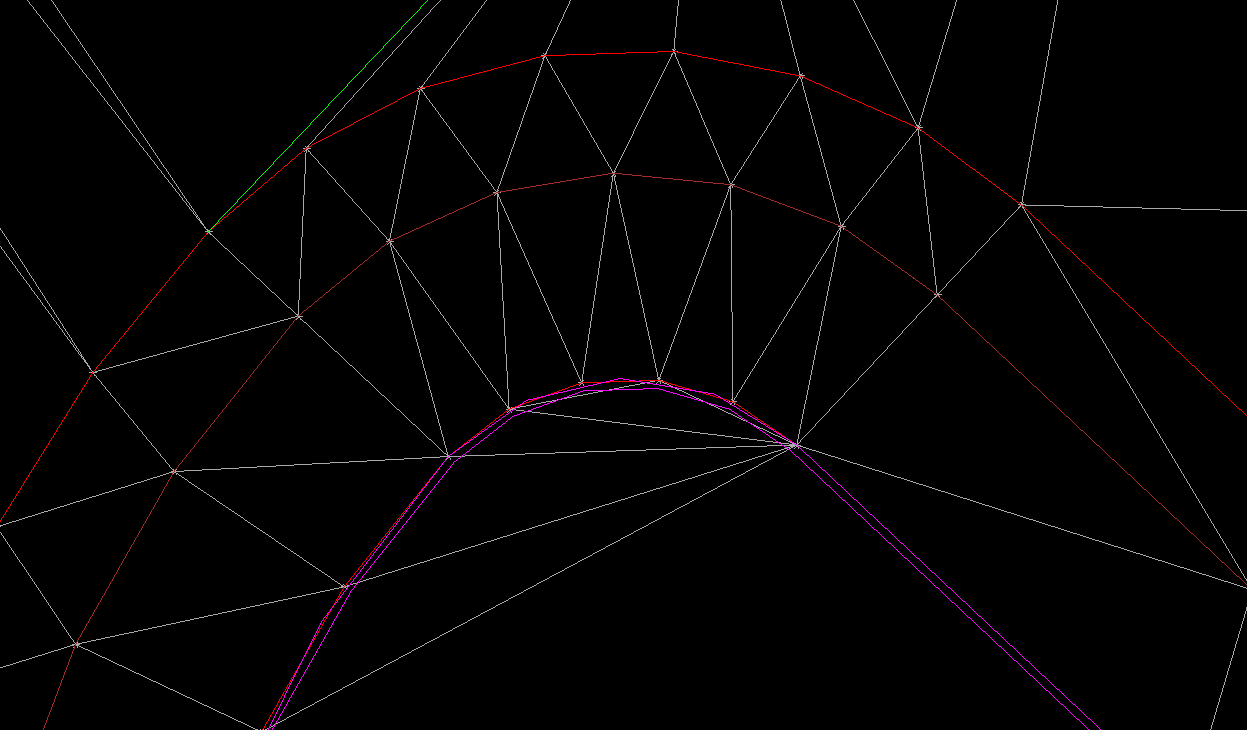
At this stage of the game, we have the minimal information to build a surface. Note that the arcs have become segmented because an arc cannot be elevated. This creates a mess, but I want you to see the process of building a surface.
When I am satisfied with the basics, I will let the program do two things.
- Add breaklines to the arcs and clean up the curves.
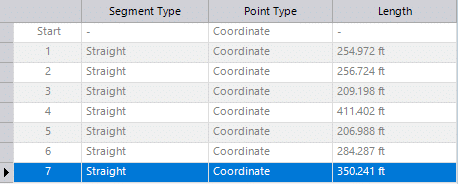
- Insert points along straight segments at the interval I want. For small sites I will go out to 10 feet. As the area gets bigger, I will set it to 20 feet as to not choke the controller.
These changes can be made on the fly and adjusted for results. You will find them in Settings/Surface/Computations.
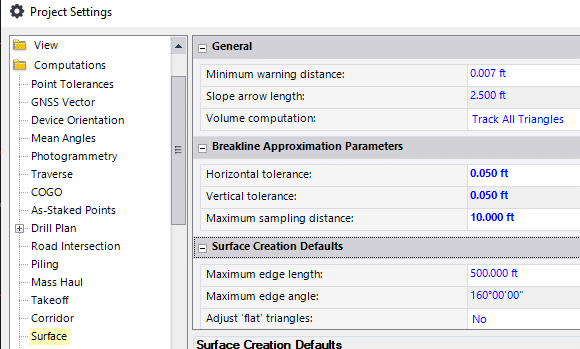
These are the settings I will use for this project. A half a tenth on horizontal and vertical node placement and no more than 10 feet between points along a straight line.
Here is that previous train wreck fixed with updated settings.
I do not always swing point placement settings this far out when building a model. There are times when you want to see the information you inserted and see where the problems are. The fact is that any interpolation of the elevations is a direct result of what you did in the first place so the errors can be fixed because you did them. Go back to the part that does not look good and get it correct.
The big thing to remember here is the linestring that needs fixing only has the elevation points you entered so the repair is easier.

Surface Tools
I love when I first get a surface made. Often, things are looking good but there is always room for improvement. Here are a couple things I do to check quality.
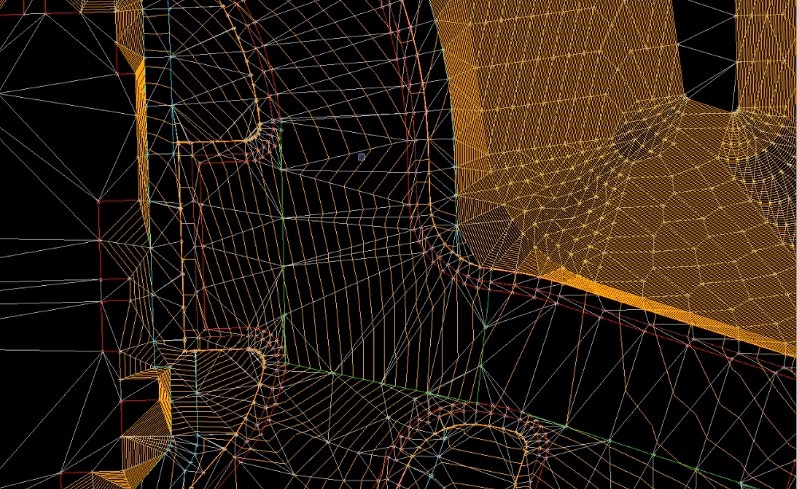
Contours
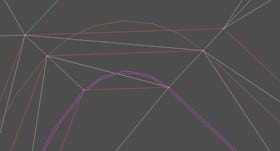
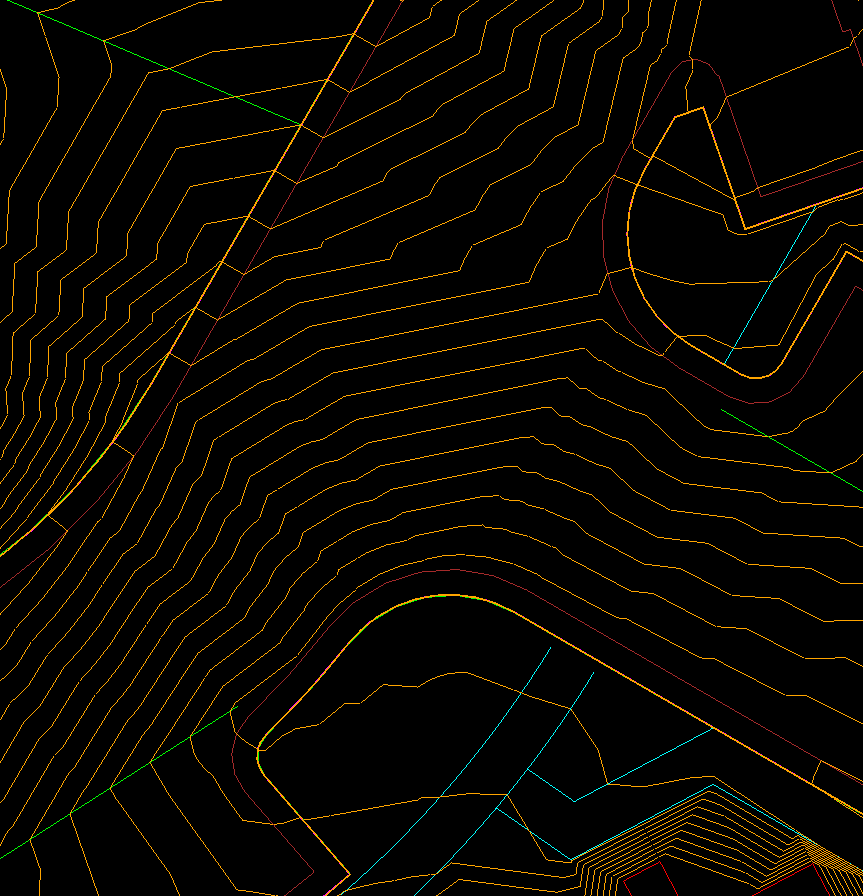
I can use contours to get a rough idea of how things look. To really get detailed, I will make the interval a tenth of a foot. No need for multiple colors, labels, or layers. You can get a good idea where to focus your energy for repairs. The image above shows a clean movement of water in this intersection. It took some work to get there and it paid off. The paving will look nice and it will move to drain correctly. Always go back to one-foot intervals after you are done for a basic sanity check. Don’t be alarmed if your contours do not match the plans exactly. Any tweaking you have done will alter the location of the one-foot lines.
Breaklines
A breakline is nothing special. It is just another name for a 3D line. We call them that because during the days of point surveys we forced a break along a line in the surface, usually at the top and toe of slopes. The name stuck and now they are used to improve a surface’s performance.
I like to use the plan and 3D views to get instant feedback. Make sure the surface rebuild method is set to auto. You will get a chance to try different ideas. As you do more of this there will be clear winning ideas for breakline placement. Pay attention to your process to reduce lines that do not help.