For many years, our business has been centered on the production of 3D data modeling for machine control. This is the low hanging fruit of a civil site. High dollar paving, building pads, and retentions are easier to do and higher quality with machine control. Fast forward to current times.
Many civil sites are being completed with machine control. The use of machine control on the job site has become a reality, to the point that contractors have started to look beyond their current use and possibilities. As many of you know, I have long been a proponent of leveraging data for a job site. I have worked with many of our clients on how to better use the data they have in their hands and drastically improve production and profits.
I will go over several ideas that are good next steps for users of 3D site data. They are in no particular order of profitability. Any site may or may not be able to use these processes. Not to worry, I will back up the explanations with a video to better explain these ideas.
JUMP TO SECTION
2D and 3D Points
Considered the domain of survey, a point has specific and relative information. I’ll use points for laying out a curb arc as an example. 3D points for the PC and PT of a curb arc give us the location and elevations of that curb run. We know the slope between the points and paving elevation is an easy calculation. Next, we add the arc center as a 2D point. Now there is a pivot to swing an arc for form or string line layout. Increasing the power of points, we offset the curb line to allow the field to set string line for a curb machine.
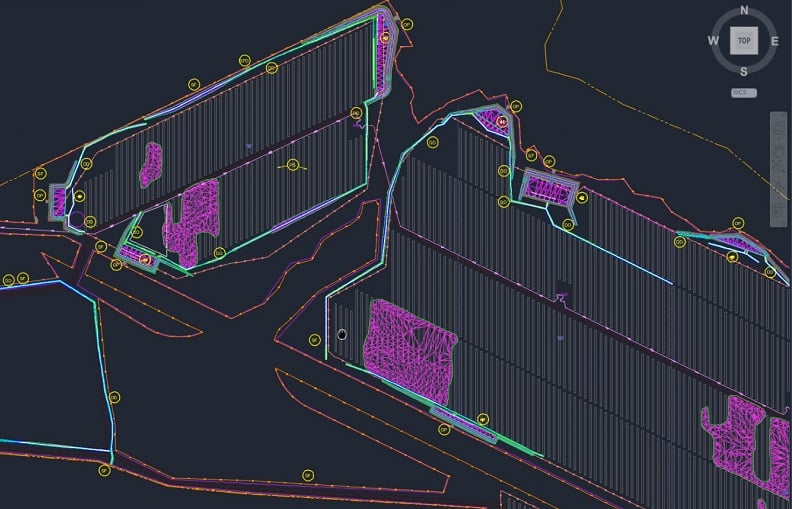
Site Layout
Using earth moving equipment to get the dirt right is a huge time saver. We also advocate the use of positioning technology for more than grading.
Electrical
It started with light pole bases and quickly escalated from there. We now regularly provide data as 2D or 3D points for the following.
- SES pads. The job has been checked so we are good with drainage and elevations on the site. The electrical service slab is easy to calculate from available regulations.
- Common area in-ground power. Many plaza shopping centers have electrical connections for decorations and kiosks. Knowing the 3D location of the connections allows electricians to easily set them right the first time.
- Common area hardscape. Everything from playground equipment to benches, these additions need some type of base and connection. It is best to know what can be accomplished while access is easy and save re-digging to set later.
Utilities
We have been providing utility layout for years. We show points 10 feet apart on the flowline for pipe with horizontal offsets if needed. Structures are marked as well. The advent of successful machine control for excavators has allowed us to provide a trench network so the operator can dig trenches correctly the first time.
Other utility details that can benefit from information provided in the data are:
- FES’s, wing walls and valley gutters. These concrete structures are better done in rough grade, but many contractors wait until near the end of construction and field fit. With a correctly prepared model there is enough confidence to build these when it’s convenient to the crew.
- Water lines are usually specified as a minimum depth below finish grade. We build the line in the data so crews can place it at any time and not make a mess of the just completed grading with required wheel trenching.
- Subdivisions have utility connections for each lot which we handle one of two ways.
- We can layout all the laterals and they are placed according to plan. When it’s time to make the connection, the rover is used to find the location of the pipe.
- When the utilities are not well defined or connections have to move, as-built shots are taken and we update the model for easy use in the future.
As-Builts
Taking shots along the way provide an ongoing record of what is being done. This helps to establish production rates as well as the basis for future submittal drawings. Here is one way to bring this into your workflow.
- I call this the “daily topo walk around.” While reviewing the work being done on a site, the superintendent has a rover and takes ground topo shots as well as items being put in the ground. In a perfect world, points would be coded but that is not critical.
- We often are asked to convert the walk around topos into as-builts or progress takeoffs. With the model on the screen overlaid to the topo points, we can usually figure out what the shots represent.
- Utilities are the biggest winner with as-built points. Before covering, if the top of pipe is measured, those are later converted to as-built drawings we put together for closing submittals. Many contractors have an issue with this, and we get it. It’s one thing to get the points but now the office needs to do full blown CAD drafting and plotting.
I will help to tie these ideas together in a video linked HERE. Please don’t hesitate to ask any questions you may have regarding these or other issues.
Update May 2020
All the things I discussed above pale in comparison to the big picture of data we strive for. All these elements are time savers and money makers, but they lead to the overarching point that data must be moved efficiently and used by everyone to be successful.
Let me follow some enhanced data through the process so you can see what needs to happen. In this example, I will work with the installation of a deceleration lane and entry to a commercial site.
Office
- Plans are reviewed and data built to existing grades shown on the plans.
- Model works well with the information we have.
- I note the entry and ask the field to get measurements of the paving at the sawcut line.
Field
- Site is set up and work starts.
- When appropriate, the field shoots paving elevations for the entry.
- The field notices the elevations are not matching with what they have on their model. The road is higher than what the model says it is supposed to be.
- Shots are sent to the office.
Office
- I take the shots from the field and compare to the plan version of the existing conditions.
- I make the adjustments to the surface and entry elevations to line up with what is there. I do not want to design the entry, but I want to present a solution to the engineer if possible. Never ask a question you do not know the answer to.
- Information is sent to the engineer for collaboration.
- Engineer approves the changes. Always make sure you get this in writing such as email. Phone approvals will come back to bite you, don’t ask how I know.
- Model is updated and sent to the field.
As I have outlined here, the depth of 3D data is realized only when it is shared and leveraged by all parties. Share the information with engineers and surveyors to improve the quality and speed of the project. Everybody wins when you give out good data.