JUMP TO SECTION
The Interface
As TBC matured, features and options have become easily available. The noun/verb selection and right click access have proven to be powerful.
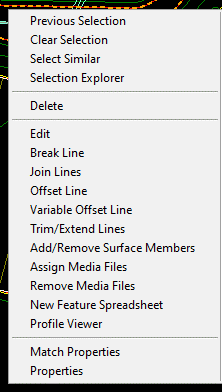
- Selection Explorer can help to group frequently selected items. It reduces the risk of not getting everything you need or too much.
- Line Commands include Edit, Break Lines, Join Lines and Offset Line. They give immediate access to fixing issues related to the line(s) selected.
- Variable Offset Line allows multiple instructions to a line and results new offsets. Think of a paving edge that can be made to form bottom and top of curb in one operation.
- Add/Remove Surface Members is a way to take things in and out of a surface. I use this a lot for testing potential breaklines in problem areas.
- Media Files are used to refer to an image of a point shot or relevant information that goes deeper than a line or node can.
- Profile Viewer brings up a quick 3D of what the linestring is doing. It’s great for troubleshooting curb grades in a parking lot.
More Power
Trimble has reset icons to promote a left to right progression for a job. Countless others have created special toolbars and icon groups to deal with not missing a step. For years, I have had to work with clients that do not have a custom setup. I think it is unnecessary to go through these steps. Learn the commands and know their location and you will get what you need. Not every job needs all the commands. I see no big rush for producing these parlor tricks. My other issue is that commands are added and changed.
With my dismissal of workflow organization, how should you go about accomplishing a job? I think every job is different. Yes, there are threads that connect all work. 2D, 3D lines and points make up a TIN. The issue is getting there. CAD files come in different flavors and I may need to run down the rabbit hole in order to get a good-looking file to work with. Once I get things cleaned up, I can finish the data prep with the usual laundry list.
Biggest Advantage
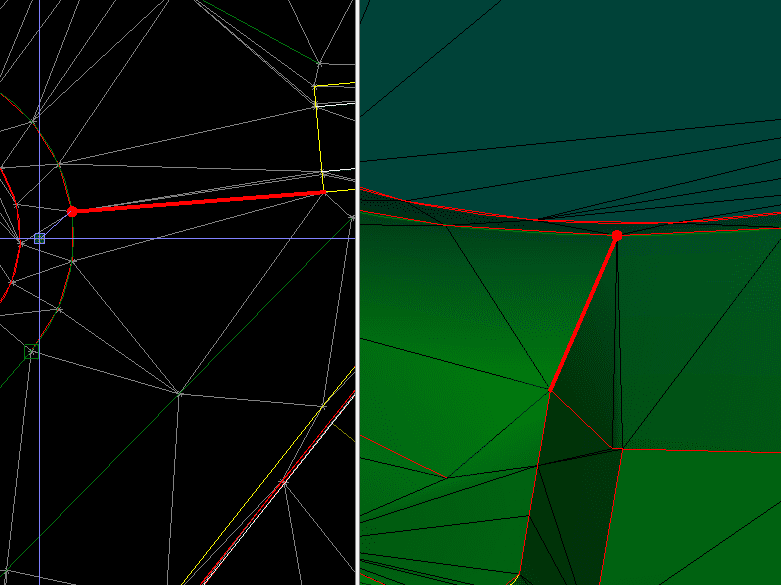
Interactive surface changes are a double edged sword. With power comes responsibility. Don’t get too cute – you might be messing with something the grader will blow through in a second. With that being said, when you need to get things changed in a hurry, accessing the 3D and plan view at the same time is important. The Surface Regeneration is usually set to auto. With big surfaces change that to “by user” to make a bunch of changes then regenerate the surface. You will save time and be able to see changes to an entire area without waiting for things to update.
The other thing I will do is add a bunch of breaklines to a job in plan view then use the Surface Members command to add or remove surface members to see what the lines are doing. Once you know what a breakline will do, remove some of them to reduce TIN density and make things cleaner.
File Transfer
The “get the file to the machine” process has always been a pain to me. Work orders and the rest are a lot of work but often necessary. I choose to do work orders when necessary for file creation. Meaning if I can make it in TBC commands, I will skip the process. With Earthworks, the process can get easier but it is still procedural.
With connected machines the work can get processed easily. We usually email files to the client’s office and they push them to the field as needed. Be careful with sending a lot of files out to operators. If you need to send one file a day, the file probably needs more work. The workers won’t know if what was done yesterday will be wrong today. An example would be a strip of pads in a subdivision. Somebody somewhere decided to raise that strip of pads by a couple of tenths. The grade checker goes out to verify the work done by the blade and finds things off. Make sure to document changes that affect the different types of work on the job with each new iteration. I use bullets and break out each trade, so you only need to pay attention to your work. Always use dates. Here is an example:
Site Changes 050120
Underground
- Storm connection in NW corner has been updated to reflect surveyed elevations.
- Waterline location changes in playground area.
Earthmoving
- Model now reflects 2 foot back of curb blowup for curb machine.
- NE retention has been redesigned.
- Lot berms have been added where required.
This information will make things in the field flow easier. It takes a few minutes in the office but makes the work in the dirt that much better. I am a big proponent of making things as easy as possible for the field. I came from there and it is a pain to type information for the rest of the crews on a small keyboard in the rain.
Layer Groups
More Layer Tips
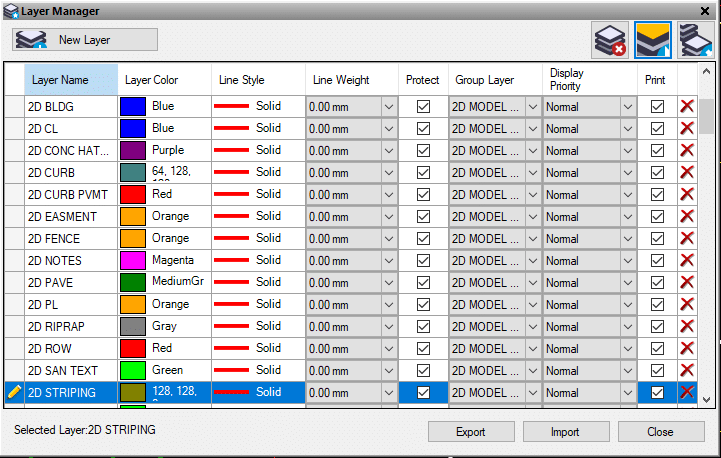
In the Layer Manager Box you can do even more things to make your life easier.
- Rename the Layer to something you use in your CAD standards.
- Change the color.
- People often ignore line style. This is a good way to see what’s on a layer. Be sure to uncheck the Show all Lines as Solid in the bottom tool bar. Things can get slow panning and zooming when this setting is off so be careful with big files.
- Line weight is a good way to highlight a layer to see what you have.
- Protect keeps the layer from being deleted. This is useful when you get a template file set up and may not have populated one of your named layers. When you go to delete all unused layers, it will prevent these from deletion.
- Display Priority keeps the layer in front or back when it overlaps a crossing line. I don’t use this much but it does help with dense CAD files.
- Turn Layer printing on or off.
- Delete a layer that is not protected and is empty.
Flags

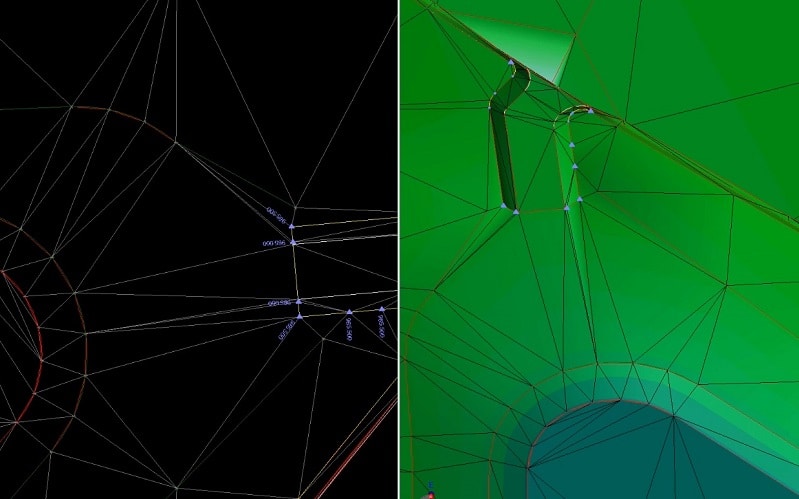
Within the Project Settings/Computations/Surface is the Minimum Warning Distance setting. This is the factory setting of 7-thousandths of a foot. This means a flag will be thrown if two crossing 3D lines are outside that tolerance. That means a lot of jobs will have flags. Maybe dumb down the amount. I’ll leave the exact number to you and if you get it around a couple hundredths, you will be on track.
Yes, everybody builds perfect models. I do not have time to chase non-essential data down a rabbit hole to reduce the number of flags. Build a good surface, set a reasonable tolerance and chase those flags. You can then dial up the difficulty and see what you have. Don’t despair. Some jobs will have none no matter how tight you go. Enjoy the moment. Other jobs will need a ton of work to get right at high numbers. Choose your battles.