The urgency to start projects and complete them quickly has become common. No matter what the use, the quicker the job is completed, the faster it’s used. Being first on the site, civil contractors generally have the least complete plans to start with. Owners do not understand that we need to know what the project is going to look like before we start planning. I have set some baselines for producing data for fast tracked projects that makes things easier for everyone.
There are three models that we will end up building which represent three distinct phases. Here are descriptions of the three basic model types for clarification.
- Mass Excavation: This represents the bulk cuts and fills on the project. Expect no better than 1-foot accuracy.
- Mass Grading: This brings things within a tenth. Retention and landscape areas should be good, and the building pads and parking areas may not be finalized.
- Fine Grading: This is the final detailed information. Entries, parking, and building pads are all finalized as well as specifics for landscape, walks, and installations on site such as benches and playground equipment.
It seems no matter how much information we get, we always need more. I will go over the information we need and how to build each of the three models. Communication with all parties is critical. The example used is for an apartment complex. The owner is not sure how many units to build. Pre-leasing will help in that decision. In the meantime, pads, parking, and common areas are not finalized. We will work with engineers to make sure the contractor only moves dirt once and the project keeps running.
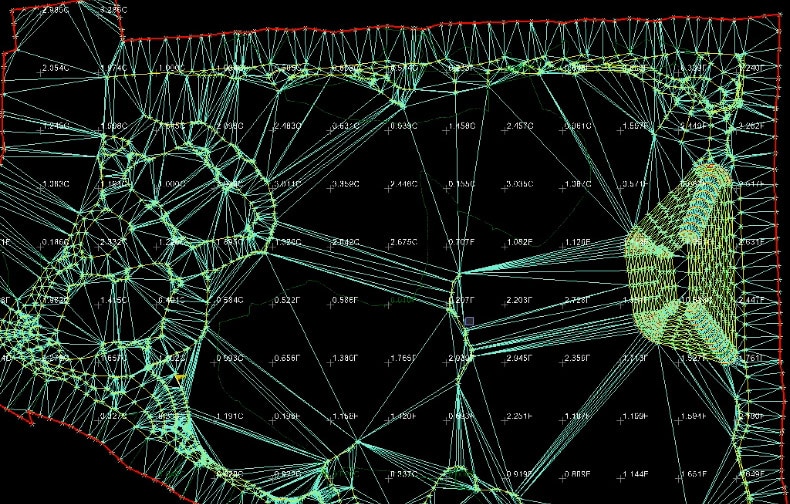
Mass Excavation
Before the crew gets to localize the site, equipment is moved in. We provided two different PDFs for use in the field. This may seem like something to keep the owner happy, but I want the work to count. The PDFs contain a 50-foot grid for cuts and fills. It’s enough for a couple days until the GPS can be set up on site and the real work begins.
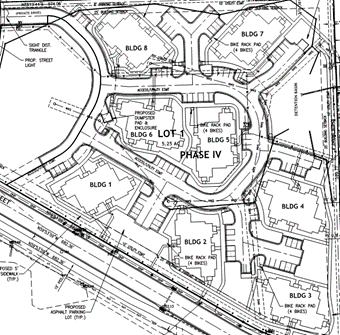
The plan set shows buildings and related access. With changes coming, we will smooth out the area and make some haul lanes. This is not a big site so we either need to start detailing or the contractor will have to leave, something that the owner does not want.
Even if the buildings change, we can get close to finish because there is usually not much elevation change between the pad and the paving areas. The biggest concern is not to build pads that are too big. This job required special compacted fill for the pads and the cost of an oversize pad would be substantial.
Summary
We can generally use the contours to get started. With larger cuts and fills, the time to get to the next phase is longer but the urgency is still there. Too much dirt moved or placed is not acceptable. Here are some tips:
- Get a good OG topo. LIDAR or a drone topo is the way to go. Do not trust the contours from the plans if possible.
- Be sure to get major drainage in at this point. No sense in making temporary ditches to move water.
- If roads are being built, consider using that path for haul roads. Final grades can be cut on this well compacted surface easier than loose material.
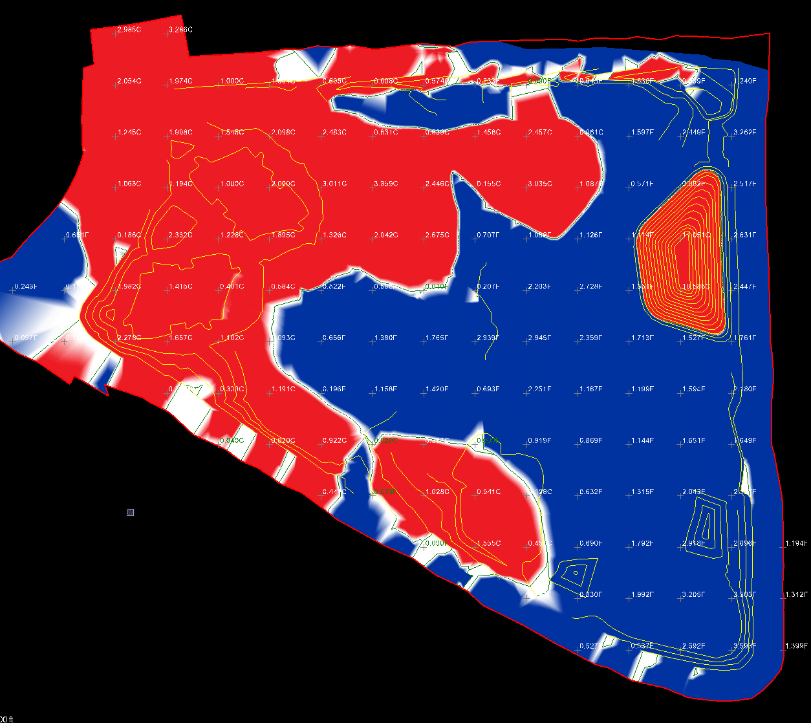
Mass Grading
- Pad sizes and elevations.
- Streets should be close to finish. If the pads are good, street elevations are usually related to their elevations.
- Utility rims and grates are set to finished elevations.
- Parking lots are not detailed but close enough to rough things in.
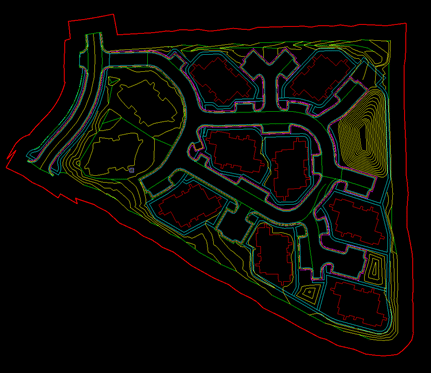
For this job, I set the building pads to elevation and size. They will be handled as their own sub-set due to select fill and compaction requirements. The curb is laid out and we have a good idea of the 2D location. Final elevations will be worked out in the last file.
As you see her, the design looks complete. It will allow the contractor to get the pads done and rough in the streets after the utilities are placed. I like to square up the pads, as that is the way they will be built. In this case they requested the actual layout.
When you are doing a job like this with a lot of detail in a small place, it is important to manage material. There is not a lot of room for excess dirt and we need to be careful with frequent drone topos to get rid of just enough material.
Summary
In a perfect world we could reduce files to no more than two. That is often the case if the rough grade file is ready to go and in a week we have the final information needed to make the fine grading surface. With the job described, the contractor needed plans to get them closer to finish without the final plans being ready. The rough grade file can buy the office some time to get the fine grading file ready. It’s important to walk away from a job and look at it with fresh eyes in the morning to get the last breaklines and spots for better performance.
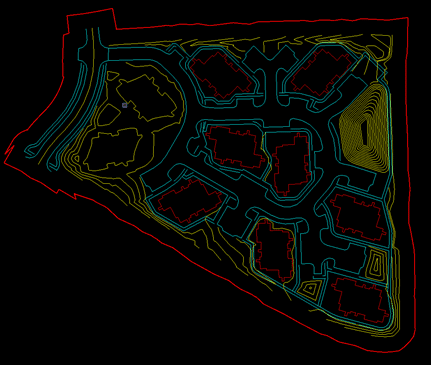
Fine Grading
- Retention areas to the correct volume required for the changes in the project along the way.
- Correct slopes away from buildings for drainage.
- Streets that drain to properly sized inlets.
- Intersections that work with traffic and shed water. No humps in main streets that will not work with posted speeds and pullouts and deceleration lanes that drain.
- Sidewalk ramps to ADA standard with sidewalk cross slopes at less than 2%.
- Parking lots graded to move water and contain no abrupt slope changes to catch low front scoops.
- As many breaklines and additional spot elevations required to make all the above work.
As you can see from the image, we added a lot of information to make the final file. These details will make the model perform better as well as give the contractor a look at what will be required to finish the project.
The green lines in this model are breaklines done by our engineer Michael Stallings, to help the surface do what we want. These are 3D lines that connect elevations on the surface to make sure the TIN links with correct elevation points. Of all the things in a model, the breaklines are the most confusing for new model builders. There is no easy answer. You need to draw a breakline in an area the does not look right to see if it improves the performance. If it does not, delete and try something else.
Summary
You want the fine grading file to be sent out last. We have had jobs where we sent out ten files as revisions and updates. The fine grading file should be a finalized surface of the information you have. If you do not have that, do not call it fine grading. The field needs to understand what the different file types do and know the tolerances placed on them.
Conclusion
Many times, we can get one file out the door with all the information needed built at once. We only hear from the contractor for the next job. I hope you have the same result and do not need to send multiple files. The following process will save you time and trouble.
- Keep file names consistent. If you use “Mass Grading” use it every time. The field will know it is close but not final, they can work with that in mind.
- Put dates on every file. It saves confusion.
- No need to bring a lot of equipment to the site initially. Start with some non-GPS machines for initial work and bring in guided equipment as things get moving.