
I have received many questions regarding what can happen to a job and how to tell what units you are in. To address this, I will first go through the correct way to do things; then go through a routine that will ignore the units and get you working.
Here is how you should go about localizing a project.
- Contact the surveyor and verify the unit type being used on the project. US Survey feet or International feet.
- States differ. The surveyor can even choose to use something different than the state recognizes. Make sure you get on the surveyors page.
You will need to start from the top down in order to make sure the job is in the correct units, but read on; it’s a mine field out there.
In the Office
- Always select, write down and refer to at least 3 points that can be located on the paper plans, the CAD files and the job in the dirt. Share these with the surveyor or ask them for three points they use for “check in”. Check in is a group of points that ends up getting memorized because you check into them several times a day, especially first thing in the morning.
- Verify the job in in the correct units; US Survey or Int’l. Draw these Check In points on the screen in the program you are using to build the data and verify that they are in the right spot. I previously mentioned the points need to be related to lines on the CAD, plans and ground. With that being the case, you will now see the points right where they belong.
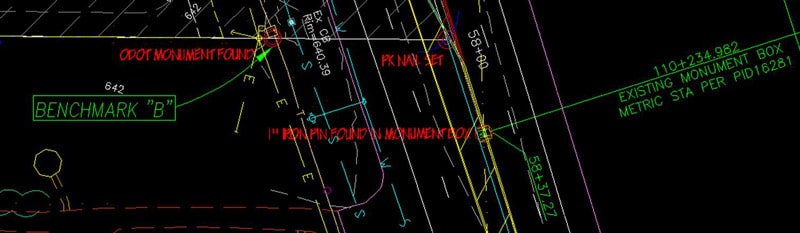
- The image shows a cluster of points. Make sure there are points scattered around the entire job. This serves two purposes; if you check into the extents of the job instead of one corner, you’re assured of the orientation. Secondly, you won’t have to walk/drive so far if you spread out the information.
- At this point you have a job set to the correct units and the check in points are where they are supposed to be. Export the data from your program in the correct units and bring it into the transfer software. This refers to the intermediate software that converts CAD data to a format readable to the field equipment.
- Many software vendors are eliminating the step of the additional software saving you one more chance for things to get fouled up.
- The data can now leave the office; it is in the correct units and properly oriented.
In the Field
- Localize with the correct units and verify residuals. With a good localization, you can now confidently install the job files.
- Upon loading the data, take the rover and head to at least 2 of the check in points at opposite ends of the job to verify you have everything set right.
- You have just verified that your job is in the correct units and oriented correctly. You may proceed to work on the job after loading and verifying each machine.
- You are only as accurate as your last occupation of one of the Check In points. We will now discuss why this is so.
What causes problems
Technology and construction are constantly improving, as we learn more we take that knowledge and put it to use in the field. As an example; a grade checker reads my article linked above and decides the job needs to be in US Survey feet. Drilling through the menus he changed the setting and went back to work. Luckily things looked funny and he had the good sense to figure out the error of his ways before ruining previous work. Crisis avoided and lesson learned.
I am all for doing things by the book as described in this article. I also spent many years in the field and understand the need for production. Here is what you need to know in order to make things work regardless of the units used.
The most important thing to remember is the difference in US and International feet is 2 parts per million. With a job localized to state plane coordinates of a N1,000,000 E1,000,000 in US feet and the site loaded in the incorrect units, it will be off by about 2 feet.
If this happens, the job can be moved to correctly occupy the Check In points and work proceed; here is the reason:
Even though the jobs units have been changed, a site or road is not big enough for the error to be noticed. As an example, if we were on a road that was a million feet (189 miles) and we moved the job to set on the start station, the road would be 2 feet off at the end. I know this is never going to happen, but it illustrates the error encountered when the job is correctly placed on your localization and Check In points. Any single site, no matter how large will remain unaffected. Larger jobs always have multiple base station locations and localizations which zero out the error on every new setup.
Tips for Success
- Start from the top down with data in the correct units. The same units the surveyor is using.
- Have shared Check In Points used by you and the surveyor. You are only as good as your last Check In, do it first thing in the morning and throughout the day.
- Immediately stop when something does not look right.
- Even though you can muscle the job into working by moving it. It is always best to start correctly. Your results will be better and you will sleep easier.